
Step-by-Step Guide to Building AI Tools and Agents with n8n
Understanding n8n and Its AI Capabilities
n8n is an open-source tool designed to automate workflows by connecting different apps and services through customizable steps called "nodes." Unlike many automation platforms out there, n8n gives users a lot of freedom with its code-friendly options, making it especially appealing for developers and businesses aiming to build advanced AI-powered processes. When it comes to creating AI tools and agents, n8n truly shines because it seamlessly integrates with well-known AI services like OpenAI and Hugging Face. This means users can easily add features like natural language processing, machine learning, and data analysis right into their automation sequences. Its key strengths include a visual editor that helps you design complex workflows one step at a time, straightforward access to HTTP requests for communicating with AI models, and triggers that start workflows based on different events. Altogether, these features make n8n a robust platform for building AI tools and agents step by step, allowing users to automate smart decision-making without needing deep coding expertise.
What is n8n?
n8n is a versatile workflow automation tool and low-code platform that makes it easy to connect different applications and services. Its user-friendly visual interface lets both developers and non-technical users craft complex automation workflows without needing to write lots of code. This adaptability makes n8n a great option for building AI tools and agents step by step, enabling users to simplify processes, bring together various data sources, and implement smart automation smoothly.
Why Use n8n For AI Agents?
There are plenty of reasons to choose n8n when building AI tools and agents, and one of the main perks is how flexible it is. It lets you create workflows that fit your exact AI needs without forcing you into a one-size-fits-all mold. Plus, it's easy to expand—developers can quickly add custom nodes or hook into third-party services to boost what your AI can do. This means the AI agents you build with n8n can grow and adapt as technology changes. On top of that, n8n shines when it comes to API integrations, making it simple to connect with different AI platforms, data sources, and apps. This is crucial for building powerful, interactive AI agents that pull from a variety of data and sophisticated models. In short, n8n gives you a flexible, scalable, and easy-to-use platform to create detailed AI tools and agents step by step.
Preparing to Build Your First AI Agent in n8n
Before you start building your AI agent with n8n, it's important to make sure you have everything set up properly. Begin by installing n8n on your computer or opting for a cloud service to simplify workflow automation. Then, gather the API credentials from the AI platforms you want to use, like OpenAI or other machine learning services—these credentials are essential for your n8n workflows to interact with AI models seamlessly. Lastly, take some time to clearly define what you want your AI agent to do, whether it’s automating customer support, analyzing data, or generating content. This planning will help shape your workflow and ensure your AI tool fits your specific goals. Taking these preparatory steps will make the process of creating n8n AI tools and agents step by step much smoother and more effective.
Installing and Setting Up n8n
Getting started with building your AI tools and agents using n8n begins with installing and setting up the platform. n8n offers flexible installation methods, letting you run it either on your local machine or deploy it to the cloud for easier access.
If you prefer a local setup, you can go with Docker, npm, or even the desktop app. Many choose Docker because it’s reliable and simple to manage—just pull the official n8n image from Docker Hub and start the container. If you opt for npm, make sure Node.js is installed, then run npm install n8n followed by n8n start to get it running. For those who like a graphical user interface, the desktop app is a straightforward choice.
For cloud deployments, you can use popular providers like AWS or DigitalOcean, or take advantage of managed services such as n8n.cloud, which handle hosting and upkeep for you.
Once n8n is up and running, open your browser and go to http://localhost:5678 for local installations or your cloud instance’s URL. This will bring you to the n8n workflow editor—a visual interface where you can craft and control workflows, the essential building blocks of your AI tools and agents. Setting up this way paves the path for your step-by-step adventure in creating powerful AI-driven automations.
Obtaining AI API Credentials
To get started with building AI tools and agents using n8n, the first thing you need is API credentials from top AI providers like Google AI, OpenAI, or Gemini. Start by signing up on their platforms—whether that's the OpenAI website or the Google Cloud Console. After registering, head over to the API section to create a new project or application. This is where you'll generate your unique API key or token, which acts as your essential authentication credential. Make sure to store this key safely since it connects your n8n workflows to the AI services. Keep in mind that each provider may have specific rules or usage limits, so it’s important to read their documentation thoroughly to set up your project correctly. Having these API credentials handy is a vital first step in the n8n AI tools and agents step by step guide, helping you achieve smooth integration and automation.
Defining Your AI Agent’s Workflow Goal
Before you jump into building AI tools and agents with n8n, take a moment to clearly define what your AI agent’s workflow goal is. Think about the exact task or interaction you want to automate—whether that’s handling customer support, extracting data, or generating leads. Focus on the problem your agent aims to solve and the results you want to see, so your AI tool truly adds value. For your first project, keep the scope focused and manageable, picking a clear goal that you can measure and improve over time. Having this clarity will help guide each step in the n8n AI tools and agents step by step process, making your automation smoother and more effective.
Building an AI Agent Workflow in n8n: Step-by-Step
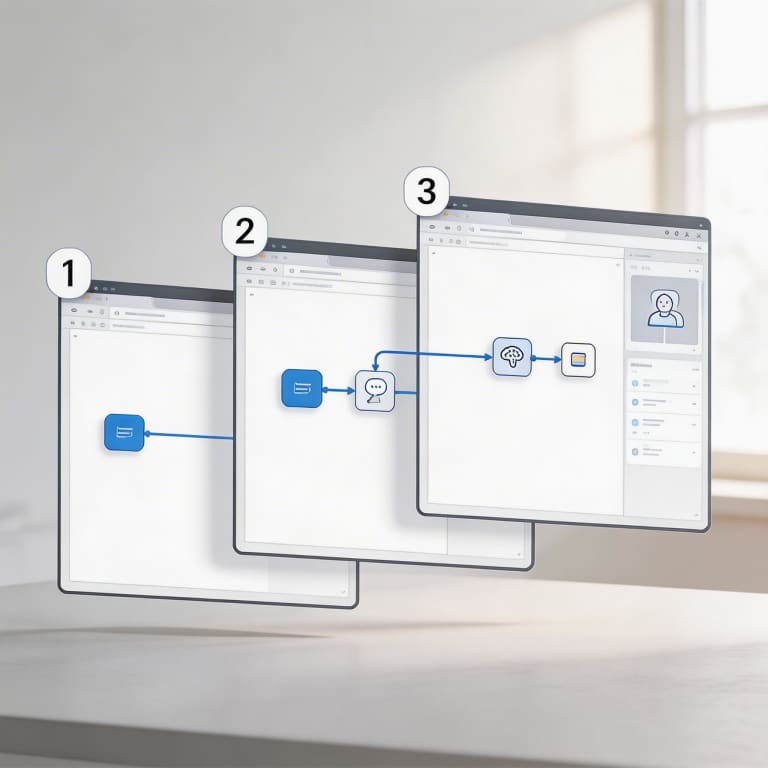
To build an AI agent workflow in n8n, start by creating a new workflow. Log into your n8n dashboard and click on 'New Workflow.' Give your workflow a clear, meaningful name to help keep your projects organized. Then, add a trigger node that kicks off the workflow—this might be an HTTP request, a webhook, or a timer, depending on what you need. After setting the trigger, bring in AI-related nodes like the OpenAI node or any other machine learning integrations offered in n8n. Configure these nodes by entering your API keys and setting parameters such as the prompt text or selecting action types to customize how the AI agent behaves. Once everything is configured, connect the nodes in a logical order so data flows smoothly from the trigger through the AI nodes and on to output nodes, like sending a message or saving data. Before you wrap up, run some manual tests using the 'Execute Workflow' feature to make sure your AI agent performs as expected. Tweak the node settings as needed based on these test results to improve performance. Following these steps will help you build effective AI tools and agents in n8n, step by step.
Step 1: Create a New Workflow
The first thing you'll want to do when setting up your AI tools and agents using n8n is to create a new workflow in the workflow editor. Once you've logged into your n8n account, head to the dashboard and select the “New Workflow” button. This will bring up a blank canvas where you can begin crafting your automation. It's a good idea to give your workflow a clear name early on, which makes it easier to stay organized, especially if you’re working with multiple AI agents. The n8n workflow editor offers a user-friendly drag-and-drop interface that lets you add different nodes representing tasks or AI integrations. Starting with a clean, well-organized workflow sets you up for a smooth and effective step-by-step experience with n8n AI tools and agents.
Step 2: Add and Configure Trigger Nodes
In this part of the n8n AI tools and agents step by step guide, we'll walk you through adding and setting up trigger nodes that kick off your AI workflow. n8n provides different trigger options like Webhooks, Cron Jobs, and Event-based triggers, each designed for specific purposes. To get started, pick the right trigger node from the node panel and drop it onto your workspace. For example, choose a Webhook trigger if you want your AI agent to respond to HTTP requests, or a Cron trigger to run tasks on a schedule. Then, customize the trigger settings by entering the needed URLs, schedules, or event details depending on what you picked. Setting up your triggers correctly is key to making sure your AI agent activates exactly when you want, laying a solid groundwork for your automation.
Step 3: Insert and Set Up AI Agent Nodes
After you’ve built the basic workflow structure in n8n, the next move is to add and configure AI agent nodes to bring intelligent automation to life. Start by grabbing the AI node from the node library right inside the workflow editor. Then, pick the AI model that suits your needs—whether that’s GPT-4 for complex language tasks or another specialized model n8n offers. Once you’ve chosen the model, set up the node by crafting prompts that will guide how the AI responds. You’ll also want to tweak settings like temperature, max tokens, and frequency penalty to get the output just right—balancing quality and creativity. Getting this setup right is key to making sure your AI agents work smoothly and deliver accurate, context-aware results within your workflow.
Step 4: Add Credentials for AI APIs
Before diving into using AI features within n8n, you’ll need to securely add your AI service API credentials. Start by heading over to the Credentials section in n8n’s interface. Choose the AI API you want to connect with—this could be OpenAI or any other provider your workflow needs. Carefully enter your API key or token, making sure there are no extra spaces or errors, so the authentication process goes smoothly. Once saved, link these credentials to the appropriate nodes in your workflow. This secure setup allows n8n to interact properly with external AI APIs, bringing smart automation to your projects. And don’t forget—always keep your credentials private and never share them publicly to safeguard your n8n AI tools and agents step by step development.
Step 5: Test and Debug Your AI Agent
Once you've built your AI agent using n8n, it's essential to thoroughly test and debug it to make sure it works reliably. Begin by running test executions right within the n8n workflow editor, using sample data that closely resembles the kind of inputs your agent will encounter in real life. Keep a close eye on the execution logs to catch any errors or unexpected behaviors. Common problems often involve incorrect data mappings or API call failures, which you can usually fix by double-checking your node settings and authentication details. Make good use of n8n's built-in debugging features, like the execution preview and error messages, to quickly find and address the issues. Also, improve your AI agent’s efficiency by looking at workflow run times and simplifying complex node arrangements where you can. By consistently testing and refining your AI tools and agents step by step with n8n, you'll boost their accuracy and make your workflows run smoother overall.
Enhancing and Customizing Your AI Agents
To really tap into the power of n8n AI tools and agents step by step, it’s important to go beyond the basics and focus on enhancing and personalizing your AI agents. Begin by adding advanced features like conditional logic, which lets your agents adapt their responses based on different inputs or results, making them smarter and more aware of the context. Then, use multi-step workflows to connect complex actions, allowing your AI to handle intricate tasks automatically. Take advantage of n8n’s extensive node library to easily integrate APIs, trigger events, and manage data transformations. By fine-tuning these aspects, you can build AI agents that aren’t just smart but are also perfectly customized to fit your specific requirements and situations.
Incorporating Conditional Logic and Control Nodes
When building n8n AI tools and agents step by step, integrating conditional logic and control nodes is key to making your workflows more dynamic and responsive. These nodes let you set clear conditions that steer the flow of data depending on real-time inputs or results. For instance, an If node can split your workflow based on specific criteria like user replies or AI model outputs. Additionally, control nodes such as Switch or Merge help by handling multiple paths and bringing results together. Using these logic nodes thoughtfully ensures your AI tools work with greater flexibility and accuracy, smoothly adjusting decisions throughout your automated workflows.
Connecting Multiple AI Services and APIs
One of the best things about n8n is how easily it lets you link together various AI services and APIs, helping you create powerful, integrated AI tools and agents step by step. To get the most out of this, start by picking AI services that complement each other—like language models, image recognition APIs, or sentiment analysis tools—that together meet your automation needs. Using n8n's user-friendly workflow editor, you can connect these services by setting up nodes that pass data from one AI API directly into another. This setup enables you to build complex processes, such as interpreting user questions with a natural language processor and then generating AI-driven data visualizations in response. You can also add conditional logic nodes to route the data differently depending on what each step in the workflow requires. By merging multiple AI services within n8n, you can craft versatile agents that handle a wide range of tasks, improve accuracy, and provide deeper insights—all while keeping the development process straightforward and manageable, one step at a time.
Utilizing Workflow Templates and Community Resources
A great way to speed up building your n8n AI tools and agents step by step is by using workflow templates and leaning on community resources. n8n has a large collection of ready-to-use workflow templates that you can easily modify to suit your unique AI automation projects. These templates give you a strong starting point, so you can skip the basic setup and focus on customizing workflows to fit your needs. On top of that, the n8n community is an excellent place to find shared workflows, integrations, and expert advice from other developers. By participating in forums, exploring GitHub repos, and visiting the official n8n community site, you gain inspiration and access to proven workflows that you can tweak or build upon. Taking advantage of these templates and community contributions helps simplify your development journey, minimize mistakes, and create advanced AI tools and agents more effectively.
Use Cases and Examples of n8n AI Agents in Action
With n8n AI tools and agents step by step, users can build a wide range of practical solutions that boost business workflows and automate everyday tasks. A key example is creating chatbots that engage customers in real time, offering quick replies and personalized help. Thanks to n8n’s user-friendly workflows, these chatbots easily connect with messaging apps and CRM systems, enhancing customer interaction and support efficiency. Another great example is email support bots powered by n8n AI agents. These bots can automatically read, sort, and reply to emails, cutting down response times and allowing teams to focus on higher-value work. Equipped with customizable triggers and AI-driven natural language understanding, n8n email bots ensure customer questions are handled without delay. Data processing AI agents also stand out as a valuable application. Leveraging n8n’s adaptable automation features, these agents collect, analyze, and act on large amounts of data without manual effort. Whether tracking social media trends, crunching sales numbers, or automating reports, n8n helps build AI agents that simplify data workflows and support smarter decision-making. By carefully following the n8n AI tools and agents step by step process, users tap into the power of automation and AI to create effective, scalable solutions that fit their unique needs.
Customer Support Automation
Automating customer support is a perfect way to put n8n AI tools and agents step by step into action. By connecting AI-powered chatbots and email responders within your n8n workflows, businesses can quickly handle common questions and offer instant help anytime. For example, you can set up an n8n workflow that spots incoming support emails or chat messages, prompts an AI agent to understand the message, and then automatically crafts helpful replies or forwards tougher issues to human support staff. This method not only speeds up response times but also boosts customer satisfaction and reduces the amount of manual work required.
Data Analysis and Reporting Bots
When working on n8n AI tools and agents step by step, one standout use is building data analysis and reporting bots. These smart agents can automatically collect data from multiple sources, process it, and create clear summaries or reports without needing someone to do it manually. By connecting APIs and databases in n8n workflows, these bots can keep an eye on data as it comes in, analyze it in real time, and highlight important metrics. This kind of automation not only saves a lot of time but also improves accuracy and ensures that valuable insights are available quickly, making it easier for your organization to make well-informed decisions.
Troubleshooting and Best Practices for n8n AI Agents
When you're working with n8n AI tools and agents step by step, running into common issues is completely normal. To keep your AI workflows running smoothly and easy to manage, start by regularly checking the error logs in n8n so you can quickly spot any failed executions. Adding detailed logging inside each workflow node can make debugging more straightforward, especially for complicated processes. It's also a good idea to use version control for your workflows—this way, you can keep track of changes and easily roll back to earlier versions if needed. Breaking down large workflows into smaller, reusable sub-workflows makes maintenance and troubleshooting much simpler. Always make sure your input data is validated and exceptions are handled nicely to avoid crashes. And don’t forget to keep your n8n instance and all connected integrations up to date to take advantage of the latest features and security fixes. Following these tips will help you create reliable and efficient n8n AI tools and agents step by step.
Common Errors and How to Fix Them
When you’re building n8n AI tools and agents step by step, running into errors is pretty normal, especially if you’re new to it. A common hiccup is API authentication not being set up properly, which can cause your workflows to fail. To sort this out, make sure you double-check your API keys and confirm that the credentials are correctly entered in n8n’s credentials manager. Another typical issue is incorrect node configuration—like when input and output data fields don’t match up. Going through each node’s settings carefully and testing them one at a time can help you pinpoint and fix these problems. You might also face runtime errors if the external services you’re using hit rate limits or experience downtime; to handle this, try adding retry mechanisms and error handling nodes to your workflows. Lastly, keeping an eye on logs and using n8n’s built-in debug tools makes it easier to quickly find what’s going wrong, helping your AI tools and agents run more smoothly.
Security and Credential Management
When working through n8n AI tools and agents step by step, it's crucial to keep your sensitive API keys and user data safe. Instead of embedding API keys directly into your workflows, make sure to use n8n's built-in credential management system to store them securely. For an extra layer of protection, enable environment variables, and limit access to your workflows and credentials by applying role-based permissions. Don't forget to regularly review and rotate your API keys, and if you're aiming for enterprise-level security, consider linking n8n with secret management services. Following these guidelines will help protect your data and keep your automation projects reliable.
Maintaining and Updating AI Workflows
Keeping your AI workflows in n8n up to date is key to making sure they keep working well as APIs change and your requirements evolve. Start by using version control for your workflows; this makes it easy to keep track of changes and go back to earlier versions if something goes wrong. Make it a habit to test your updates in a staging environment before moving them to production—this helps you spot any problems that might come up because of API changes or tweaks in your automation setup. Also, keep an eye on updates from the AI services you use, since changes or retired endpoints might mean you need to update your nodes or authentication settings in n8n. By staying on top of version control, thorough testing, and adjusting to new AI API developments, you’ll be able to maintain your n8n AI tools and agents effectively, step by step.
Additional Resources and Learning Materials
If you're looking to deepen your knowledge and improve your skills in building n8n AI tools and agents step by step, there are plenty of helpful resources to explore. A great place to begin is the official n8n documentation, which provides thorough guides and clear explanations about workflow automation and integrating AI. You can also check out n8n’s wide range of templates that let you quickly set up ready-made workflows and tailor them to fit your specific needs. On top of that, there are many practical tutorials available on platforms like YouTube and Medium, designed for all skill levels. Don’t forget to join the lively n8n community forums and discussion boards—these are fantastic places to ask questions, share your experiences, and keep up with the latest tips and trends in developing AI tools with n8n. Using these resources will definitely help you become more proficient at creating smart, efficient AI-powered automation solutions.
Official n8n Documentation and Tutorials
If you're eager to create n8n AI tools and agents step by step, the official n8n documentation and tutorials are the perfect place to start. They offer clear guidance covering everything from how to set up your environment and create workflows, all the way to more advanced automation strategies that incorporate AI features. Plus, the n8n team keeps things fresh with regularly updated tutorials and practical example workflows, available both on their website and YouTube channel. By tapping into these trusted resources, you'll be well-equipped to build powerful and efficient AI agents, while following n8n’s recommended practices and making use of their newest capabilities.
Community Forums and Open Source Contributions
Getting involved in the n8n community forums is an essential part of learning how to use n8n AI tools and agents step by step. These forums offer a welcoming space where users can ask for help, share their workflows, and work together to fix problems. On top of that, by contributing to n8n’s open-source projects, developers can not only improve the platform but also gain valuable practical experience. Joining in on conversations and code reviews helps users stay in the loop about the newest features and best practices, making the process of building AI tools and agents with n8n both easier and more rewarding.
What is n8n and how does it support building AI tools and agents?
n8n is an open-source, low-code workflow automation tool that enables building AI tools and agents step by step through visual workflows integrating AI APIs like OpenAI and Hugging Face, allowing users worldwide to automate intelligent processes easily.
How do I install and set up n8n for AI automation?
Installing n8n can be done locally via Docker, npm, or a desktop app, or through cloud services like n8n.cloud. After installation, access the workflow editor via your local URL or cloud instance to start building AI automation workflows.
What are the steps to create an AI agent workflow in n8n?
Steps include creating a new workflow, adding and configuring trigger nodes, inserting AI agent nodes with appropriate models and prompts, adding API credentials securely, and testing and debugging the workflow to ensure proper AI-driven automation.
How do I securely add and manage AI API credentials in n8n?
Use n8n’s built-in credential management section to enter and store your API keys safely. Avoid hardcoding keys in workflows, apply role-based permissions, and consider environment variables or secret management services to protect sensitive data.
What are common troubleshooting tips for n8n AI workflows?
Regularly check error logs, validate input data, use detailed node logging, break large workflows into sub-workflows, maintain version control, implement retry and error handling, and keep your n8n instance and integrations up to date for smooth operation.